The RT809H Programmer is a handy tool for anyone working with chip programming or data recovery. Whether you’re a technician fixing TVs or a hobbyist updating firmware, this device can make your life easier. But to get the most out of it, you need to know a few tricks. we’ll share five expert tips to help you use the RT809H Programmer like a pro. These tips will save you time, reduce mistakes, and boost your efficiency. Let’s dive in!
Tip 1: Master In-Circuit Programming (ISP)
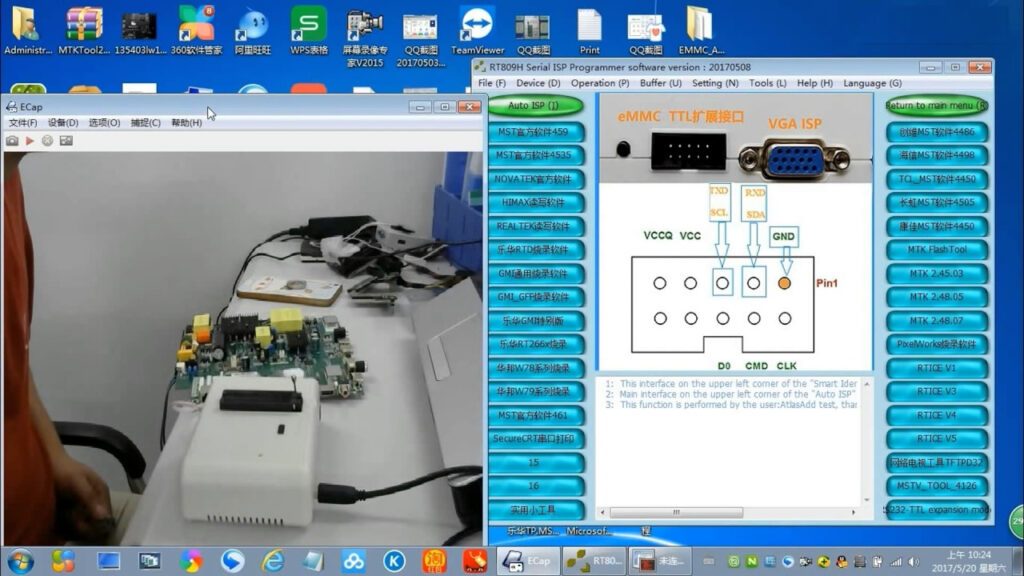
In-Circuit Programming, or ISP, is a fantastic feature of the RT809H. It lets you program chips without removing them from the circuit board. This saves time and keeps delicate parts safe. Imagine updating the firmware on a router—ISP lets you do it without taking the whole thing apart. With the RT809H, you connect directly to the device’s ISP header. Just follow the manual to match the power, ground, and data lines correctly.
ISP is great for firmware updates or recovering data from embedded systems. Here’s how to use it:
- Look up the ISP header pinout in the device’s manual.
- Plug the RT809H into the target device with the ISP cable.
- Open the RT809H software and pick the chip type.
- Start the read or write process.
- Double-check the connection to avoid errors.
Mastering ISP will make your work faster and safer. Try it next time you’re working on a project!
Tip 2: Utilize Non-Disassembly Programming for TVs
The RT809H shines when it comes to programming LCD TVs without opening them up. You can update firmware or recover data using the TV’s VGA or HDMI port. This feature is a huge time-saver and protects the TV’s insides from damage. For example, many Samsung TVs work with this method—just check the compatibility list on the official RT809 website first.
Here’s how to do it:
- Connect the RT809H to the TV’s VGA or HDMI port with the right cable.
- Launch the software and choose the TV programming option.
- Follow the instructions on the screen to read or write the flash memory.
This trick is a favorite among TV repair pros. It’s quick, easy, and keeps everything intact. Give it a shot if you’re in the repair business!
Tip 3: Optimize Chip Handling and Adapter Usage
Chips come in all shapes and sizes, and the RT809H needs the right adapters to handle them. Using the wrong one can mess up programming or even break the chip. Adapters matter because they match the chip’s pin layout and voltage. For instance, 1.8V chips need a special voltage board, while chips with over 32 pins require the PEB-1 board. If you’re dealing with NAND FLASH chips and get socket errors, welding the chip to the board can fix it.
Check out this quick guide:
| Chip Type | Adapter/Board | Notes |
|---|---|---|
| 1.8V Chips | Specific Voltage Board | Matches voltage for safe programming. |
| >32 Pins | PEB-1 Board | Works with bigger pin counts. |
| NAND FLASH | Weld on Board if Needed | Fixes socket issues for a solid connection. |
Always peek at the manual to pick the right adapter. Getting this step right means smooth programming every time.
Tip 4: Leverage Auto-Detection and Intelligent Features
The RT809H has some smart features that make programming a breeze. Auto-detection figures out the chip type for you, cutting down on guesswork and errors. Intelligent IC positioning ensures the chip sits perfectly in the socket—super important for getting it right. To keep these tools sharp, run a self-test diagnostic in the software before you start. You’ll find it in the diagnostic menu.
Also, keep your software fresh. Updates add support for new chips and fix bugs. Grab the latest version from the official RT809 website. Using these features well saves time and keeps mistakes to a minimum.
Tip 5: Troubleshoot Common Issues about RT809H Programmer
Even the best tools can hit snags. Knowing how to fix common RT809H problems keeps your projects on track. Here are some issues you might face and how to solve them:
- Low Voltage with S3F Series Chips: Check pins 13-16 with a multimeter. If the voltage is under 4V, swap resistors R63/R64 for 1k ohm ones.
- Reading Failures with EC Chips (e.g., IT8585/8586): Ground pin 100 and keep signal lines under 10cm with 3.3V power.
- Chip Not Recognized: Make sure the chip’s in right, clean the contacts, and use the correct adapter.
- Software Crashes: Reinstall the software or look for updates online.
For tougher problems, check the manual or hop onto an online forum. Quick fixes like these keep downtime low and your work flowing.
Conclusion
The SPI RT809H Programmer is a powerhouse, and these five tips will help you use it like a pro. Mastering ISP speeds up your workflow. Non-disassembly programming simplifies TV repairs. Proper chip handling avoids costly errors. Smart features like auto-detection make things easy, and troubleshooting skills keep you moving forward. Always check the manual and update your software for top performance. Whether you’re a pro technician or a curious hobbyist, these tips will take your chip programming to the next level. Start applying them today!